
Backend
The backend is built with Laravel. The backend is served under http://localhost:8000/api. You can find backend files under src/backend. After the first run with docker-compose up, dependencies will be installed automatically. If you prefer to install dependencies manually or need to add additional packages, follow these steps:
Enter the Docker container named "laravel":
bashdocker exec -it -u www-data backend-dev bashRun the following command to install dependencies, replacing {plugin-name} with the actual name of the package:
bash./composer.phar install {plugin-name}
These steps ensure that you can manage dependencies either automatically during the initial docker-compose up or manually when needed. Make sure to replace {plugin-name} with the actual name of the package you want to install.
We followed the laravel folder structure for the backend. If you want to learn more about the folder structure, you can check the Laravel documentation.
Artisan and Tinker caveats
Our Multi-tenancy design uses two Laravel connections: micro_power_manager for the central database and tenant for the tenant databases.
On normal operation the tenant database connection is set on-the-fly by MicroPowerManager. As a result not all Artisan and Tinker commands might work out-of-the-bos when called from shell.
Viewing Tenant models
To view a Model in tenant space, make sure you have a local development setup, then call model:show-tenant instead of model:show.
For example
php artisan model:show-tenant Agent
php artisan model:show-tenant "Meter\Meter"
Using Artisan Tinker Shell
As a first step in a Tinker shell configure the DemoCompany tenant connection like so:
$databaseProxyManagerService = app(\App\Services\DatabaseProxyManagerService::class);
$databaseProxyManagerService->buildDatabaseConnectionDemoCompany();
Then you can use Tinker to create Tenant models
$person = new \App\Models\Person\Person();
$person->name = 'A Name'
$person->surname = 'A Surname'
$person->save();
Automatically generate Model properties
MicroPowerManager ships with a custom version of Laravel IDE Helper which can be used to automatically generate PHPDocs for Model properties.
To generate Model properties enter a local development container using
docker exec -it -u www-data backend-dev bashThen run
php artisan mpm-ide-helper:models -RW
composer rector-fix
Schemas
Central Database Schema
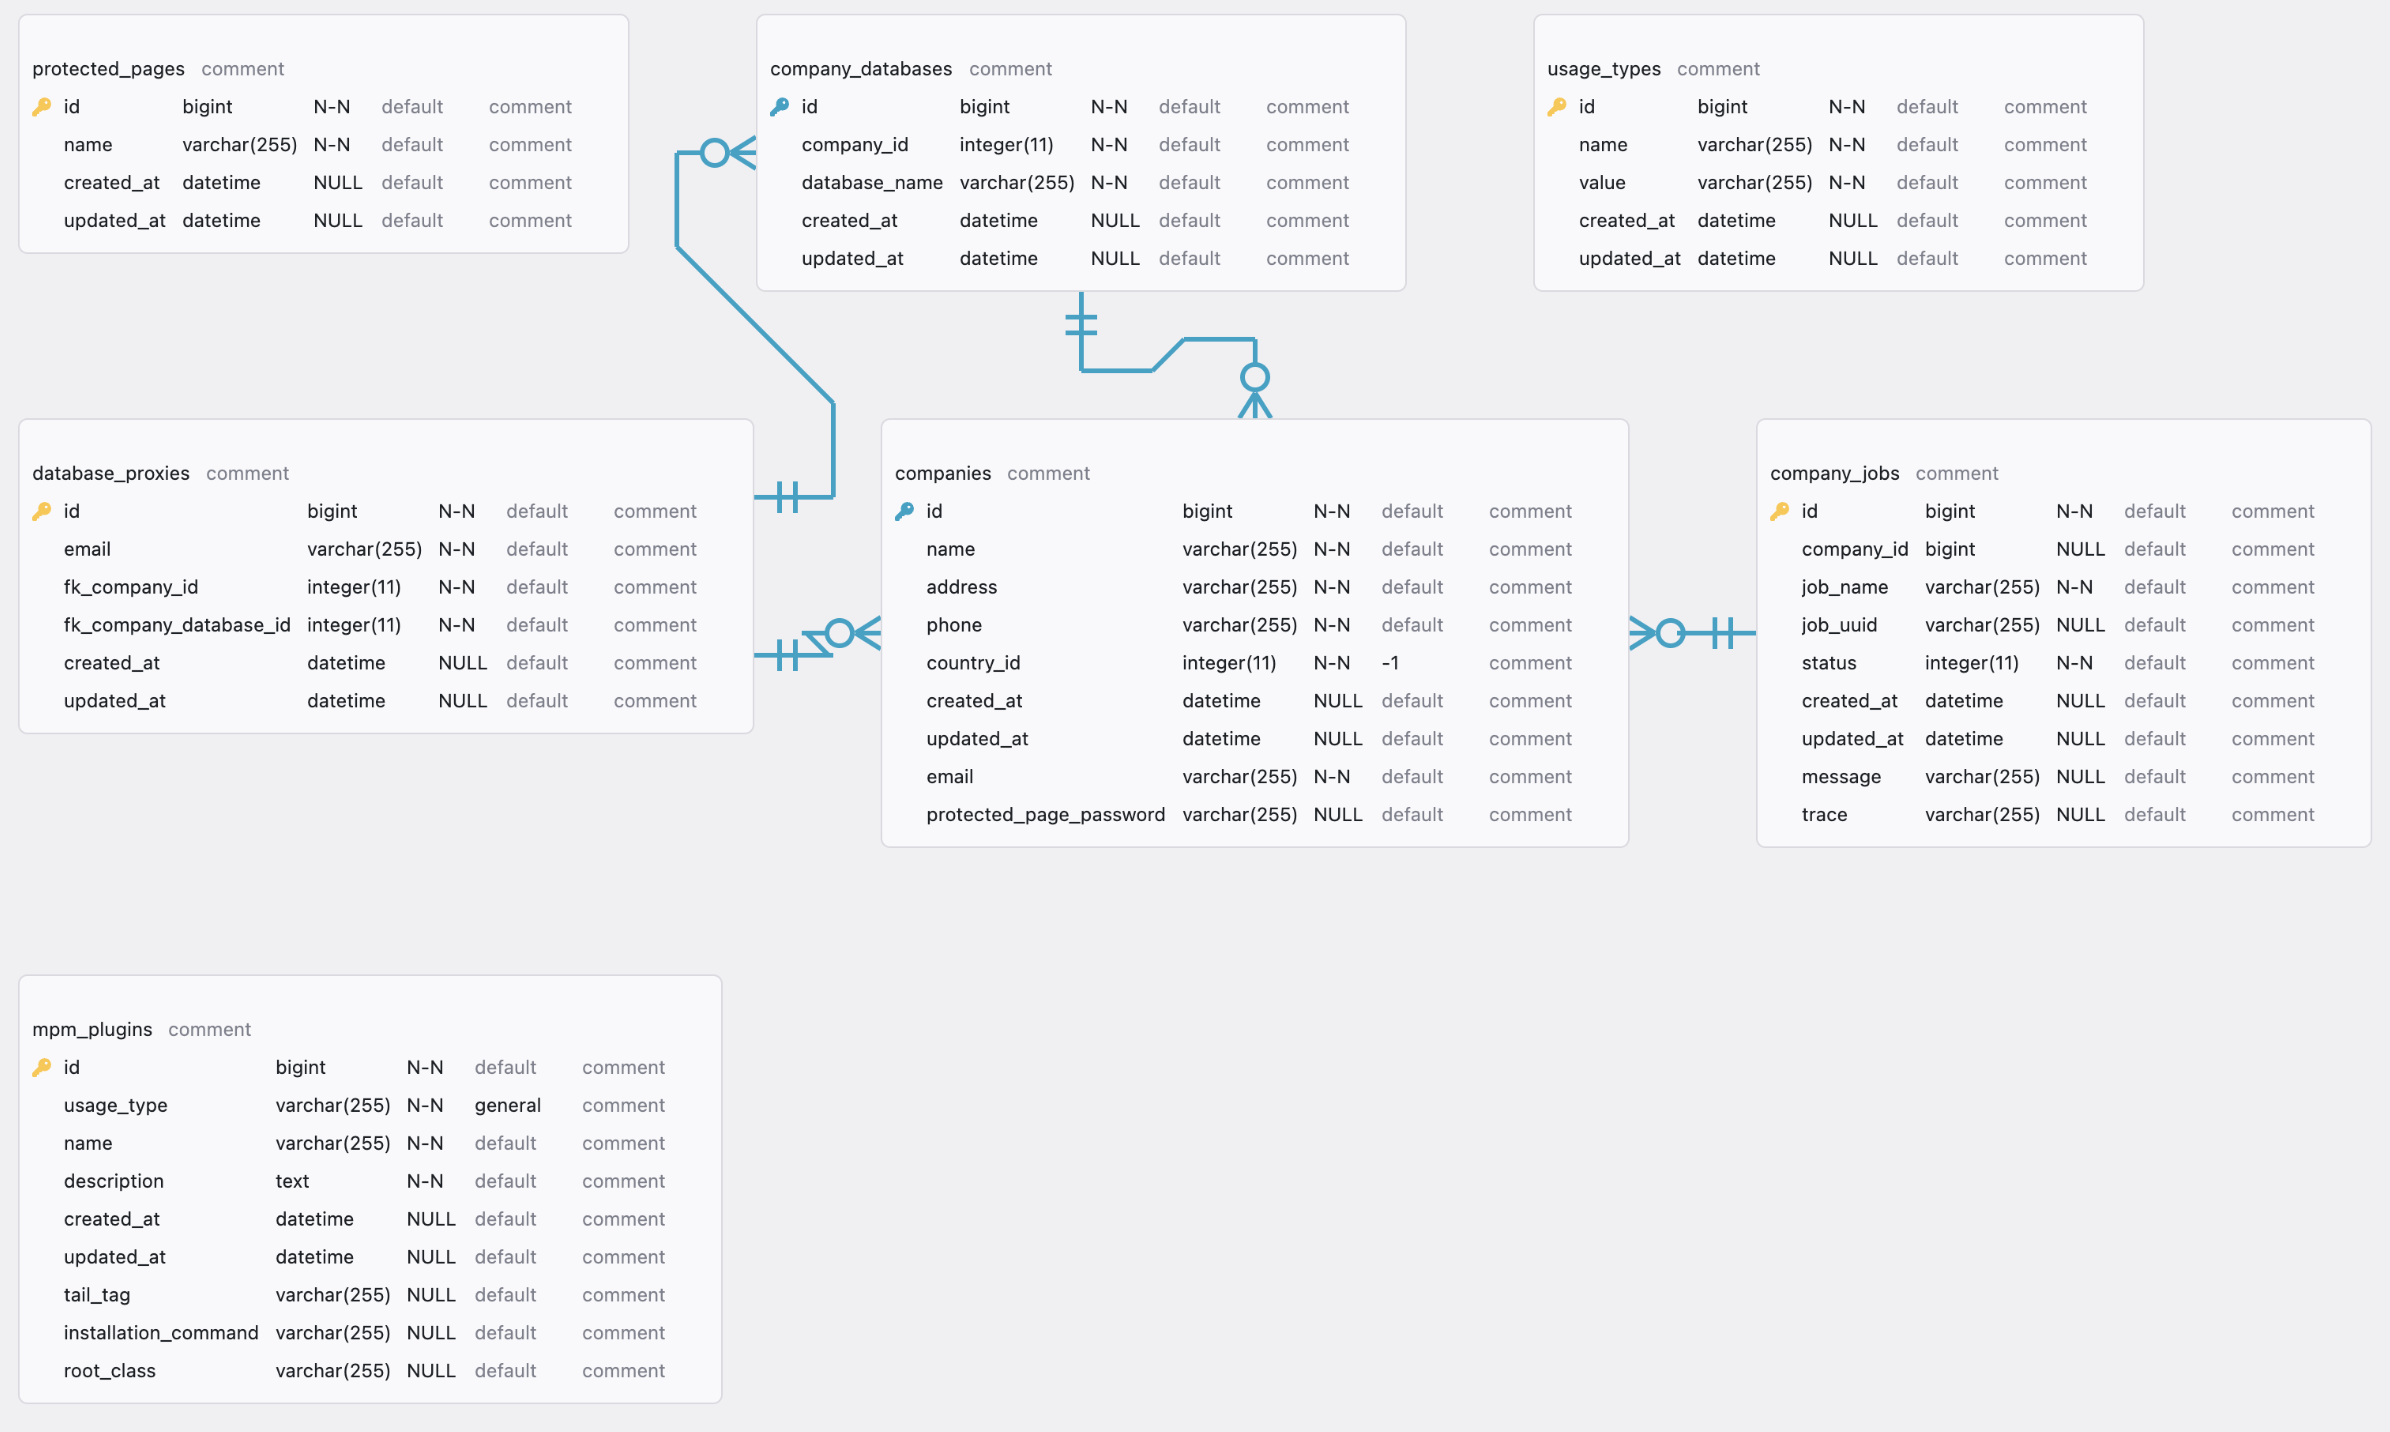
Tenant Database Schema
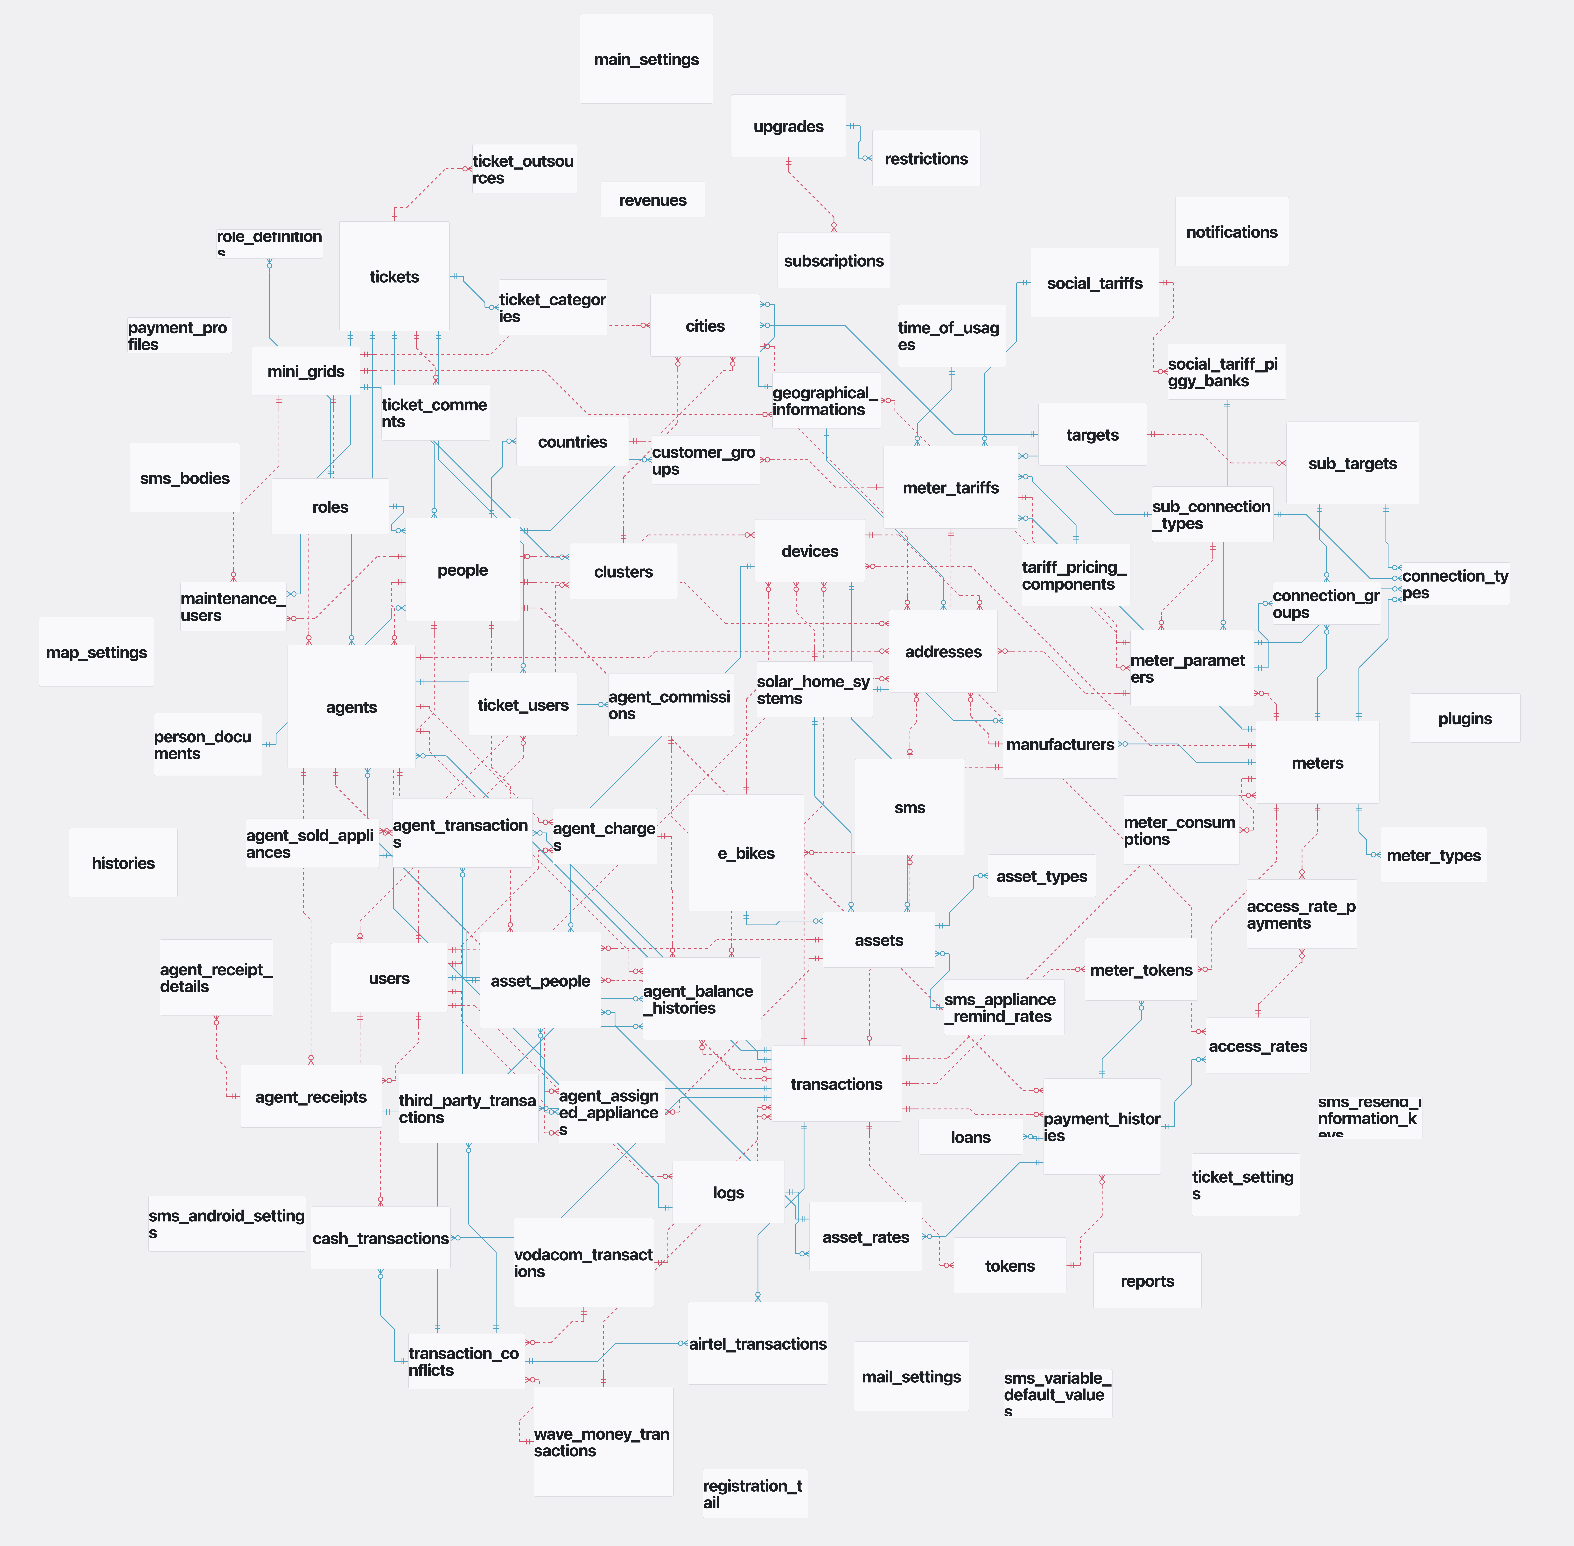
NOTE
The schema of the central database is massive. In erd-editor you can use Right Click => Automatic Table Placement to get nicer overview.
Cluster, MiniGrid, Village relations

Connection Groups and Types

Transactions abstractions
To model real world transactions and their implications in MicroPowerManager different abstractions are used.
Transactions: General purpose system level Transaction. Used to interact and be linked with other MicroPowerManager objects and models.
Payment Provider Transactions: Represents a transaction specific to a payment provider. Objects and models may contain information specific to the payment provider, for example external id, order id or reference id.
Manufacturer Transactions: Represents how the transaction enables or interacts with manufacturer-specific devices. Objects and models may contain information specific to the manufacturer, for example external id or site id.

API docs
OpenAPI documentation for MPM can be found here: OpenAPI docs
Docker Compose and Docker Images
To debug Docker build errors the following command can be used to examine errors locally
docker buildx build -t test-tag-for-debugging -f docker/DockerfileBackendProd .